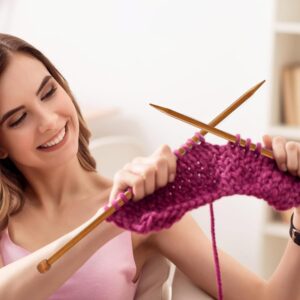
Basic knitting techniques and simple designs are required to create beginner-friendly sweater patterns. Here is a thorough how-to instruction for five such patterns, all of which offer a blend of style and ease.
5 Amazing Knitting Sweater Patterns:
1. Basic Crew Neck Pullover
Supplies Required:
- Yarn: Choose a color of medium-weight (worsted) yarn.
- Knitting Needles: US 8 or 5 mm is the size that is recommended for your yarn.
- Stitch markers are optional, but they are useful for section marking.
- The tapestry needle is used to weave in ends.
Actions:
Step 1: Swatch gauge
To find your stitches per inch, knit a gauge swatch in stockinette stitch (knit one row, purl one row). If needed, adjust needle size to fit gauge on design.
Step 2: Put It On
Cast on using a flexible cast-on technique, such as the long-tail cast-on, for the amount of stitches required for your size.
Step 3: Body Knitting
Work until the sweater is the desired length from the cast-on edge to the underarm, using stockinette stitch (knit one row, purl one row).
Step 4: Cut Out the Arms
To make armholes, bind off a certain number of stitches at the start of the next two rows. Keep knitting each area independently.
Knit the sleeves in Step 5.
To shape the sleeves, decrease at regular intervals while knitting in rounds or rows, picking up stitches along the armhole edge.
Step 6: Bring Shoulders Together
Sew shoulder seams together using the mattress stitch or a comparable technique, right sides facing.
Knit the neckline in Step 7
To finish the neckline, pick up stitches around the edge and knit a ribbed or garter stitch border.
Step 8: Conclude
To give your sweater a great shape, block it and weave in any ends that remain.
2. Simple Raglan Sweater
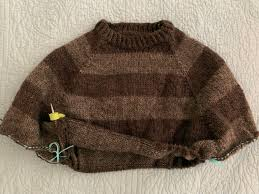
Supplies Required:
- Yarn: Choose a color of medium-weight (worsted) yarn.
- Knitting Needles: US 8 or 5 mm is the size that is recommended for your yarn.
- Stitch markers: For labeling raglan gains.
- The tapestry needle is used to weave in ends.
Actions:
Step 1: Swatch gauge
To find your stitches per inch, knit a gauge swatch in stockinette stitch. If needed, change the needle size.
Step 2: Put It On
If knitting in the round, cast on stitches for the body and sleeves using a circular needle.
Step 3: Body Knitting
Stitch in stockinette, increasing at raglan lines and using markers to divide sleeves.
Step 4: Form Sleeves
Work in the round, decreasing at the raglan lines until you reach the cuff for each sleeve individually.
Step 5: Connect the Body and Sleeves
Once the sleeves are completed, sew them onto the body and keep working in stockinette thread.
Knit the neckline in step 6.
Gather stitches around the neck to create a garter or ribbed border.
Step 7: Completion
Enjoy your final product by weaving in the ends and blocking the sweater to give it shape.
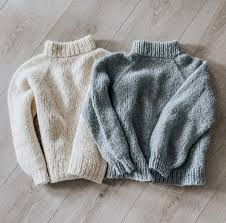
3. Oversized Chunky Sweater
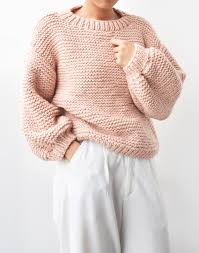
Supplies Required:
- Yarn: Chunky yarn with a lot of bulk.
- Knitting needles: For an open, loose fabric, use large needles (size 13 or 15).
- Stitch markers: Not required, but helpful for keeping track of rows.
- The tapestry needle is used to weave in ends.
Actions:
Step 1: Swatch gauge
To find your stitches per inch, knit a gauge swatch in stockinette stitch. If needed, change the needle size.
Step 2: Put It On
Use a stretchy cast-on method to cast on stitches for the body.
Step 3: Body Knitting
Work the sweater in either garter or stockinette stitch until the desired length is reached.
Step 4: Form Sleeves
Gather stitches around armholes and decrease to form while knitting sleeves flat or in the round.
Step 5: Attach sleeves and shoulders
Put the sleeves and shoulders together with a mattress stitch or a similar technique.
Knit the neckline in step 6.
Gather stitches around the neck to create a garter or ribbed border.
Step 7: Completion
Sew in ends, shape your sweater by blocking it, and then cuddle up with your giant, snug masterpiece.
4. Color Block Sweater
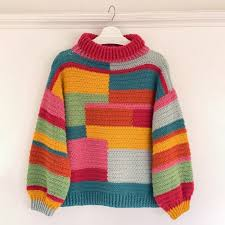
Supplies Required:
- Yarn: Multicolored, medium-weight (worsted) yarn.
- Knitting Needles: US 8 or 5 mm is the size that is recommended for your yarn.
- Stitch markers: Not required, but useful for adjusting colors.
- The tapestry needle is used to weave in ends.
Actions:
Step 1: Swatch gauge
To find your stitches per inch, knit a gauge swatch in stockinette stitch. If needed, change the needle size.
Step 2: Put It On
If knitting in the round, cast on stitches for the body and sleeves using a circular needle.
Step 3: Body Knitting
Stitch in stockinette, adjusting the color for each block as needed.
Step 4: Form Sleeves
Work in the round or flat, working each sleeve separately, changing colors to match the body.
Step 5: Attach sleeves and shoulders
Put the sleeves and shoulders together with a mattress stitch or a similar technique.
Knit the neckline in step 6
Gather stitches around the neck to create a garter or ribbed border.
Step 7: Completion
Once the ends are woven in, block the sweater to give it structure, and show off your chic color block pattern.
5. Lace Panel Sweater
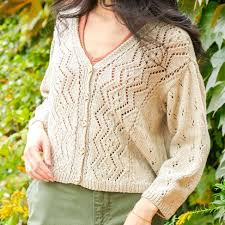
Supplies Required:
- Yarn: For the lace detailing, use light to medium weight yarn.
- Knitting Needles: US 6 or 4 mm is the size that is recommended for your yarn.
- Stitch markers are useful for keeping track of repeating lace patterns.
- The tapestry needle is used to weave in ends.
Actions:
Step 1: Swatch gauge
To find the number of stitches per inch, knit a gauge swatch using your lace pattern. If needed, change the needle size.
Step 2: Put It On
If knitting in the round, cast on stitches for the body using a circular needle.
Step 3: Body Knitting
Work with lace panel repeats as directed, using stockinette or garter stitch.
Step 4: Form Sleeves
Work sleeves separately, using repeats of the lace panel, in the round or flat.
Step 5: Attach sleeves and shoulders
Put the sleeves and shoulders together with a mattress stitch or a similar technique.
Knit the neckline in step 6
Pick up stitches to create a simple ribbing or a lace border around the neckline.
Step 7: Completion
Bring the ends together, shape your sweater by blocking it, and enjoy the subtle elegance of your lace panel pattern.
Conclusion
Beginners can experiment with a variety of styles and techniques by using these five simple knitting sweater patterns. You may learn how to knit clothing with confidence and expertise by creating lovely, wearable sweaters by following these comprehensive step-by-step instructions. Take pleasure in your knitting endeavors and learn more design and the fulfillment that comes from wearing your own crafts!
Related Article
Crochet Scarf for Beginners: In 5 easy steps
Pingback: Easy 3-In-1 Crochet Bag Pattern -