
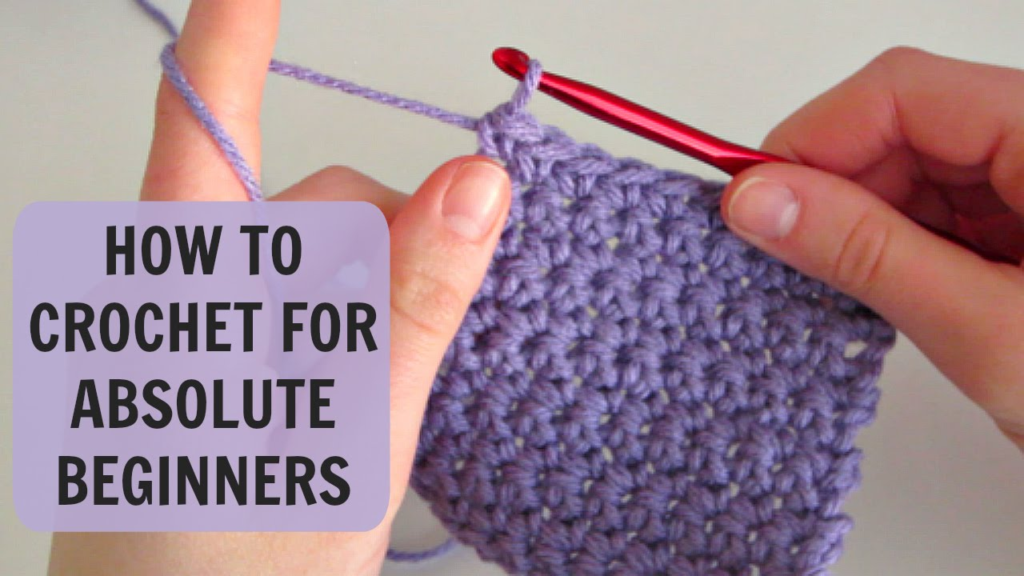
Greetings from the vibrant worlds of knitting and crocheting! This beginner’s book will bring you through the fundamentals of these ageless crafts and get you started on your creative path, regardless of your level of experience.
Crochet guide

To embark on your adventures, you’ll need a few essential tools:
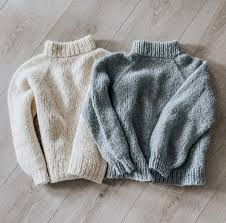
- Yarn: Choose a yarn type and color that excites you. Worsted weight yarn is great for beginners in both crochet
- Crochet Hooks: Select the appropriate size needles or hooks based on your yarn’s thickness.
- Scissors: A good pair of sharp scissors for cutting yarn.
- Stitch Markers (optional): Useful for marking stitches and patterns.
Learning the Basics:
- Chain Stitch (ch): The foundation of crochet projects.
- Single Crochet (sc): Creates a dense fabric ideal for many projects.
- Double Crochet (dc): Adds height to your crochet work.
- Half Double Crochet (hdc) and Treble Crochet (tr): Expand your stitch repertoire.
Chain Stitch (ch): The foundation of crochet projects.
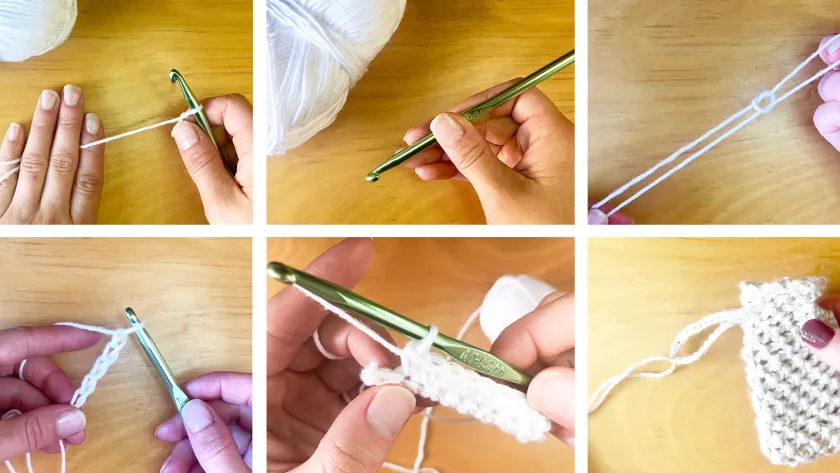
It is true that the foundation of all crochet creations is the chain stitch, sometimes abbreviated as “ch”. It is used to make the first row or foundation chain and is the basis of practically all patterns. How to do a chain stitch is as follows:
Start with a Slip Knot: Using your hook, tie a slip knot. You may quickly change the size of your chain using this knot.
Yarn Over: Using your dominant hand, hold the crochet hook and wrap the yarn around it in a loop from back to front.
Pull Through Loop: Pull the yarn through the slip knot loop with the hook. That produces a single chain stitch.
Repeat: To continue creating chain stitches, carry out steps 2 and 3 once more. A new chain stitch is made with each yarn over and draw through the loop.
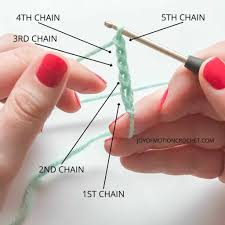
Counting Stitches: To make sure the foundation of your project is the right length, count how many chain stitches you have completed.
The foundation for other crochet stitches is formed by the chain stitch, which produces a network of connected loops. To ensure uniformity in your work, it is imperative that you maintain an even tension when creating chain stitches.
Single Crochet (sc): Creates a dense fabric ideal for many projects.
One basic crochet stitch that produces a dense fabric and is perfect for a variety of items like dishcloths, blankets, clothing, and amigurumi is the single crochet stitch, also known by its abbreviation “sc”. How to make a single stitch is as follows:
Insert Hook: As directed by the design, insert your crochet hook into the second chain from the hook. On your hook, there need to be two loops.
Yarn Over: From back to front, wrap the yarn around the hook.
Pull Through: To get two loops on your hook once more, pull the yarn through the chain stitch.
Pull Yarn Through Both Loops: Yarn over hook once more and pull yarn through hook’s two loops. Now that you have finished the single stitch, there should be just one loop left on your hook.
Repeat: Until you reach the end of the row, keep making single stitches in each chain stitch.
Turning Chains: You might need to make turning chains at the end of each row, depending on your pattern and the kind of cloth you’re working with. When you flip your piece to work in the opposite way, turning chains provide your work height and solidity.
The tight, robust cloth created by the single stitch is excellent for projects needing structure or durability. It’s a multipurpose stitch that may be used to make complex patterns and textures either by itself or in conjunction with other stitches. Gain comfort with this fundamental technique by practicing single stitches.
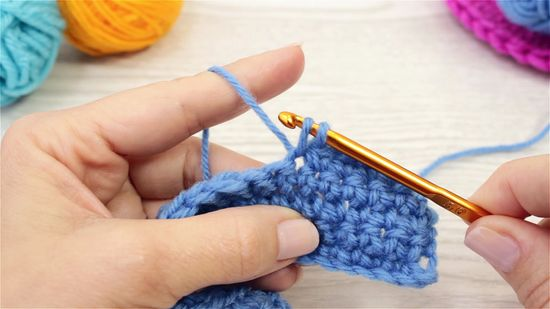
Double Crochet (dc): Adds height to your work
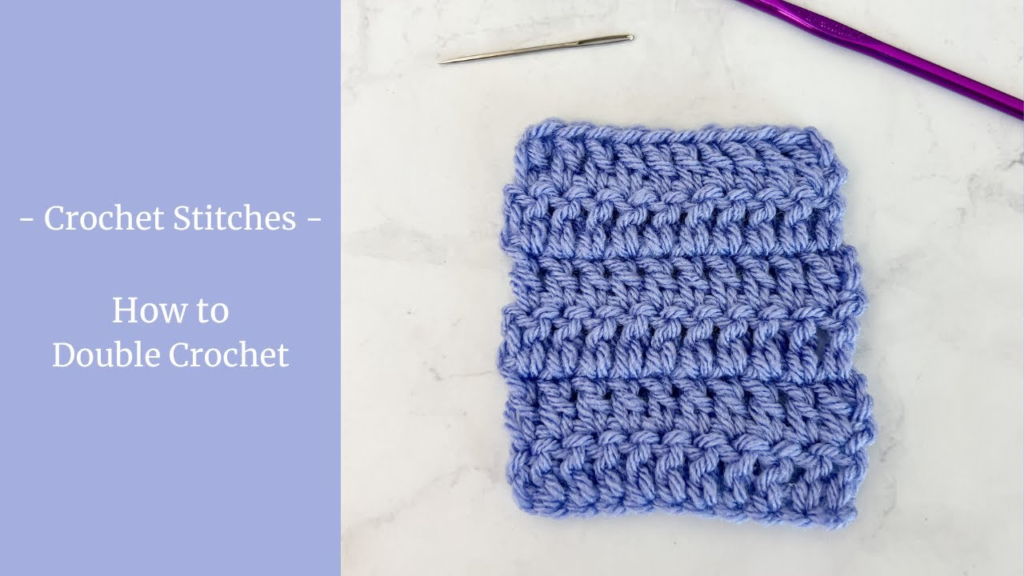
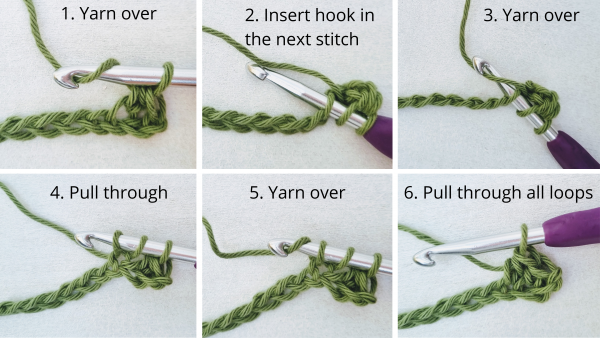
Compared to single crochet, the double crochet stitch (abbreviated as “dc”) is taller and gives your creation more height. It’s frequently utilized in patterns to swiftly add height or to make the fabric seem more open and airy. How to create a double crochet stitch is as follows:
Start with a Foundation Chain: Begin by creating a foundation chain of the desired length for your project.
Yarn Over: Wrap the yarn over your crochet hook from back to front.
Insert Hook: Insert your hook into the fourth chain from the hook (or as specified in your pattern). You should have three loops on your hook.
Yarn Over and Pull Through: Wrap the yarn over the hook again and pull it through the chain stitch. You now have three loops on your hook.
Yarn Over and Pull Through Two Loops: Wrap the yarn over the hook again and pull it through the first two loops on your hook. You should have two loops remaining on your hook.
Yarn Over and Pull Through Two Remaining Loops: Wrap the yarn over the hook one final time and pull it through the remaining two loops on your hook. This completes the double crochet stitch.
Repeat: Continue making double stitches in each chain stitch across the row.
Turning Chains: At the end of each row, create turning chains to bring your hook up to the correct height for the next row of double stitches.
There are many uses for the adaptable double stitch in crocheting crafts. It’s frequently used in conjunction with other stitches to produce lacework or textured patterns. To become efficient in this crucial technique, practice producing double stitches.
Half Double Crochet (hdc) and Treble Crochet (tr):
You can accomplish so much more with crafts if you learn more stitches than just single and double. The half double crochet (abbreviated as “hdc”) and the treble crochet (abbreviated as “tr”) are two crucial stitches to understand. This is how these stitches are made:
Half Double Crochet (hdc)
Expanding your stitch repertoire beyond single and double crochet opens up a world of possibilities in crochet projects. Two important stitches to learn are the half double crochet (abbreviated as “hdc”) and the treble crochet (abbreviated as “tr”). Here’s how to make these stitches:
- Start with a foundation chain of the desired length.
- Yarn over (yo) your hook.
- Insert your hook into the third chain from the hook (or as specified in your pattern).
- Yarn over again and pull up a loop. You should have three loops on your hook.
- Yarn over once more and pull through all three loops on your hook. This completes the half double crochet stitch.
- Repeat steps 2-5 across the row.
Treble Crochet (tr)
- Yarn over your hook twice (yo twice).
- Insert your hook into the fifth chain from the hook (or as specified in your pattern).
- Yarn over and pull up a loop. You should have four loops on your hook.
- Yarn over and pull through the first two loops on your hook. You should have three loops remaining on your hook.
- Yarn over and pull through the next two loops on your hook. You should have two loops remaining on your hook.
- Yarn over and pull through the next two loops on your hook. You should have two loops remaining on your hook.
- Yarn over one more time and pull through the last two loops on your hook. This completes the treble crochet stitch.
- Repeat steps 1-6 across the row.
Starting Your First Project: Project Ideas:
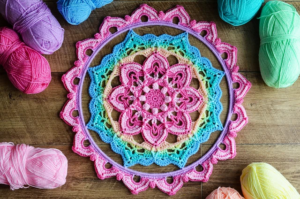
Granny Square: Perfect for learning basic:
The granny square is a classic and versatile crochet motif that’s perfect for beginners to learn basic crochet stitches and techniques. It’s also a building block for creating larger projects like blankets, scarves, and even garments. Here’s how to make a basic granny square:
Materials Needed
- Yarn in your choice of colors
- Crochet hook suitable for your yarn weight
- Scissors
- Yarn needle (for weaving in ends)
Instructions
- Start with a Slip Knot: Create a slip knot on your crochet hook.
- Chain 4: Make a chain of 4 stitches and join with a slip stitch to form a ring.
- Round 1
- Chain 3 (counts as your first double stitch).
- Work 2 double stitches into the center of the ring.
- Chain 2 (this creates the corner space).
- Work 3 double stitches into the center of the ring.
- Chain 2 (corner space).
- Repeat the sequence of 3 double stitches, chain 2, 3 double stitches, chain 2 until you have four groups of 3 double crochet stitches with chain 2 spaces between them.
- Join with a slip stitch to the top of the beginning chain 3 to close the round.
- Round 2:
- Chain 3 (counts as your first double crochet stitch).
- Work 2 double stitches into the chain 2 corner space from the previous round.
- Chain 2 (corner space).
- Work 3 double stitches into the same chain 2 corner space.
- Chain 1 (this creates the side space).
- In the next chain 2 corner space, work 3 double stitches, chain 2, 3 double stitches.
- Chain 1 (side space).
- Repeat the sequence of 3 double stitches, chain 2, 3 double stitches in each chain 2 corner space with chain 1 spaces between them along the sides.
- Join with a slip stitch to the top of the beginning chain 3.
- Continue Adding Rounds:
- Repeat round 2, increasing the number of chain 1 side spaces as needed to keep the square flat.
- Each round should have corners made of 3 double stitches, chain 2, 3 double stitches, and sides with chain 1 spaces between them.
- Finishing:
- Once your granny square reaches the desired size, fasten off the yarn and weave in any loose ends with a yarn needle.
- You can make multiple granny squares and join them together to create larger projects like blankets or scarves.
The granny square is a great way to practice chaining, double crochet stitches, joining yarn, and creating different shapes within a crochet project. It’s also a fun and creative way to play with color combinations and design variations.
Amigurumi: Create cute stuffed toys
Amigurumi is a Japanese art of creating cute and small stuffed toys using crochet techniques. These adorable creations are perfect for adding a touch of whimsy to your crafting projects or as heartfelt gifts for loved ones. Here’s a basic guide to creating amigurumi:
Materials Needed
- Yarn in various colors
- Crochet hook suitable for your yarn weight
- Stuffing material (polyester fiberfill or yarn scraps)
- Yarn needle
- Safety eyes or embroidery thread for eyes
- Stitch markers
- Scissors
Instructions
- Choose a Pattern: Start by selecting an amigurumi pattern that you’d like to create. There are many free and paid patterns available online, ranging from simple animals to complex characters.
- Gather Materials: Once you have your pattern, gather all the materials needed including yarn, hook, stuffing, safety eyes or embroidery thread, and any other embellishments mentioned in the pattern.
- Begin Crocheting:
- Start with a magic ring (also known as magic circle) or chain 2 and work the first round into the second chain from the hook.
- Follow the pattern instructions to create the body, head, arms, legs, and any other components of your amigurumi toy. This typically involves making single crochet stitches in the round and using increases and decreases to shape the toy.
- Use stitch markers to keep track of rounds and important points in the pattern.
- Adding Features:
- Attach safety eyes or embroider eyes using embroidery thread as indicated in the pattern.
- Use embroidery thread or yarn to create mouth, nose, or other facial features if required.
- Add any embellishments such as buttons, bows, or felt pieces to enhance the character of your amigurumi toy.
- Stuffing and Closing:
- Stuff the toy firmly with polyester fiberfill or yarn scraps, ensuring it’s evenly distributed to create a plush and huggable toy.
- Close any openings using a yarn needle and matching yarn, following the pattern’s instructions for sewing up seams.
- Finishing Touches:
- Weave in any remaining yarn ends using a yarn needle to secure them inside the toy.
- Give your amigurumi toy a final shaping by gently adjusting the stuffing and shaping the limbs or features as desired.
- Enjoy Your Creation: Once your amigurumi toy is complete, take a moment to admire your handiwork and enjoy the joy it brings as a cute and cuddly companion or decorative piece.
Creating amigurumi is a delightful and rewarding project that allows you to explore your creativity while making charming and personalized gifts or decorations. Have fun experimenting with different patterns, colors, and designs to bring your amigurumi creations to life!
Conclusion
You’ll pick up the fundamentals of crocheting quickly with perseverance and practice. Recall that it’s acceptable to begin modest and progressively take on more difficult tasks. Savor the process of making exquisite handcrafted items!
According to Lantern Moon learn more easy technique of crocheting.
https://www.lanternmoon.com/blogs/blog-post/step-by-step-guide-to-basic-crochet-stitches
Pingback: 7 positive Tips About Crochet Dog Stuff Toy You Need To Know
Pingback: 1 Crafting Hobby: The happiness of Crochet
Pingback: Crochet Scarf for Beginners: In 5 easy steps
Pingback: Crochet Stitches 5 most popular pattern You Need to Know