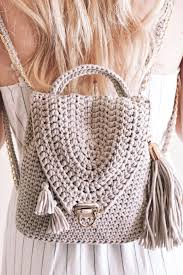
Crochet Backpack is a rewarding project that allows you to create a functional and stylish accessory. Whether you’re making it for yourself, a loved one, or to sell, a crochet backpack can be customized in countless ways to reflect your personal style. In this guide, we’ll walk you through the process of crocheting your own backpack, from selecting materials to adding the finishing touches.
Crochet Backpack: Step-By-Step Guide
1. Choosing the Right Materials
Yarn Selection
The first step in crocheting a backpack is choosing the right yarn. Since a backpack needs to be sturdy and durable, opt for a yarn that is thick and strong, such as a medium to bulky weight yarn. Cotton yarn is an excellent choice because it’s durable, has little stretch, and is easy to clean. Alternatively, a blend of cotton and acrylic can provide both durability and some flexibility.
Consider the color and texture of the yarn as well. Solid colors can make a statement, while variegated yarns add a unique pattern to your backpack.
Hook Size
The hook size you choose will depend on the yarn weight. Typically, a larger hook size is used for bulky yarns, while a smaller hook is suitable for thinner yarns. For a standard medium-weight yarn, a 5.0 mm (H-8) or 5.5 mm (I-9) crochet hook is commonly used. The hook size will affect the tightness of your stitches and the overall structure of the backpack.
Additional Materials
In addition to yarn and a crochet hook, you’ll need a few other materials:
- Stitch Markers: To keep track of your rows and rounds.
- Tapestry Needle: For weaving in ends and sewing pieces together.
- Zippers or Buttons: If you plan to add closures to your backpack.
- Straps: You can crochet straps or use pre-made straps for added durability.
- Lining Fabric (optional): To add structure and protect the interior of your backpack.
2. Basic Stitches and Techniques
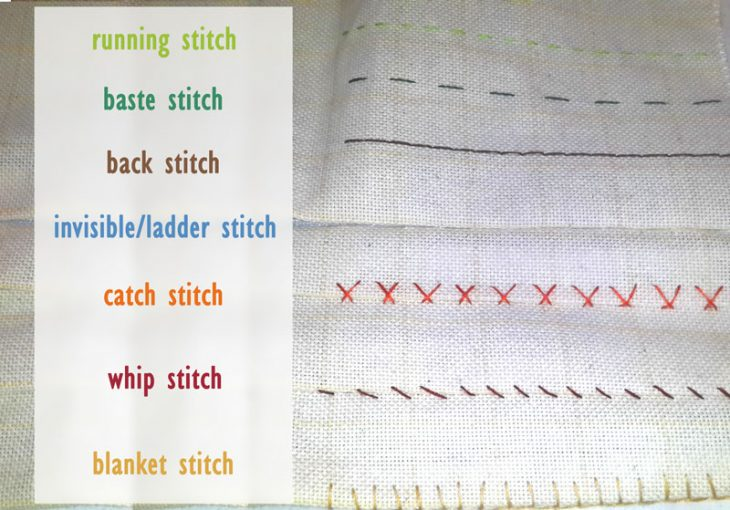
Key Crochet Stitches
Before starting your backpack, familiarize yourself with the basic crochet stitches that will be used:
- Chain Stitch (ch): The foundation of most crochet projects.
- Single Crochet (sc): A tight stitch that creates a dense fabric.
- Half Double Crochet (hdc): Slightly taller than a single crochet, adding height and texture.
- Double Crochet (dc): A taller stitch that adds height and flexibility.
- Slip Stitch (sl st): Used to join rounds and finish off your work.
Working in Rounds
Most backpack patterns are worked in rounds, starting from the base and moving upwards. To work in rounds, you’ll start with a magic ring or a chain that’s joined into a loop. Then, you’ll crochet in a continuous spiral or joined rounds, depending on the pattern.
Increasing and Decreasing
Increasing (adding stitches) and decreasing (reducing stitches) are essential techniques for shaping your backpack. Increases are made by working multiple stitches into one stitch, while decreases are made by working two or more stitches together.
3. Crocheting the Backpack Base
Starting with the Base
The base of the backpack is typically a flat, round, or oval shape. Here’s a simple pattern for a round base:
- Magic Ring: Start with a magic ring and work 6 single crochets into the ring. Tighten the ring and join with a slip stitch. (6 sts)
- Round 2: Chain 1, work 2 single crochets in each stitch around. Join with a slip stitch. (12 sts)
- Round 3: Chain 1, work 1 single crochet in the next stitch, 2 single crochets in the following stitch; repeat from * to * around. Join with a slip stitch. (18 sts)
- Round 4: Chain 1, work 1 single crochet in each of the next 2 stitches, 2 single crochets in the following stitch; repeat from * to * around. Join with a slip stitch. (24 sts)
- Continue: Keep increasing in this pattern until the base reaches your desired size.
Shaping the Base
If you prefer an oval or rectangular base, you can modify the increases accordingly. For an oval base, start with a longer chain and work in rounds, increasing at the ends. For a rectangular base, you can crochet a flat rectangle and then work single crochet stitches around the edges, adding increases at the corners.
4. Building the Body of the Backpack
Working Upward
Once the base is complete, you’ll start working upwards to create the body of the backpack. This is usually done in continuous rounds without joining, which creates a seamless look. Switch to a half double crochet or double crochet stitch for a faster build-up.
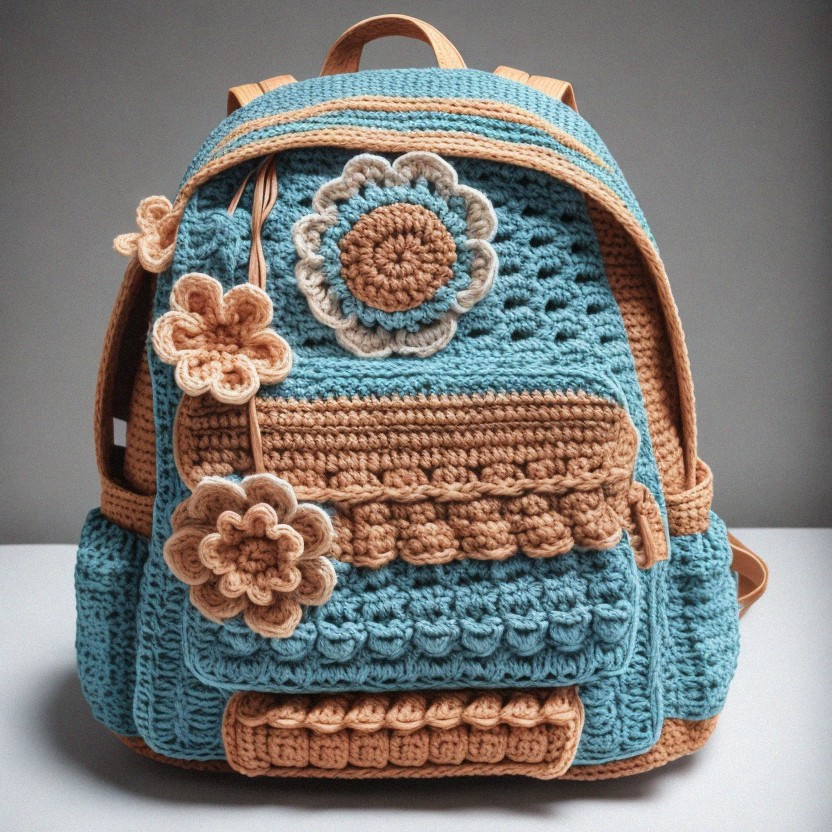
Adding Texture and Design
To add interest to the body of your backpack, consider using different stitch patterns or color changes. Here are a few ideas:
- Striped Pattern: Alternate between two or more colors every few rows.
- Shell Stitch: Create a textured pattern by working groups of stitches (e.g., 5 double crochets) in one stitch.
- Post Stitches: Use front or back post stitches to create raised lines or ridges.
- Granny Squares: Incorporate granny squares or other motifs into the body for a unique design.
Creating Pockets
If you want to add exterior or interior pockets to your backpack, now is the time to do so. Crochet small rectangles or squares and sew them onto the body. You can also create a flap for the pocket by adding a few extra rows and securing it with a button or snap.
5. Finishing the Top and Adding Closures

Tapering the Top
As you reach the desired height of your backpack, you’ll need to taper the top to create a closure. This can be done by gradually decreasing the number of stitches in each round. You can also switch to single crochet stitches to tighten the fabric and make the top more secure.
Adding a Drawstring
One popular closure method is a drawstring. To add a drawstring, create a row of eyelets (small holes) near the top of the backpack. You can do this by working a series of chain stitches and skipping corresponding stitches in the row below. Then, crochet a long chain or use a cord and weave it through the eyelets.
Zippers and Buttons
For a more secure closure, consider adding a zipper or buttons. If using a zipper, sew it onto the top edge of the backpack, ensuring it’s aligned properly. For buttons, create buttonholes by skipping stitches, and then sew the buttons onto the corresponding side.
6. Crocheting the Straps
Basic Crochet Straps
Crocheting the straps is one of the final steps. Basic straps can be made by crocheting long, narrow rectangles:
- Chain: Chain the desired length of the strap.
- Rows: Work single crochet or half double crochet rows back and forth until the strap is the desired width.
- Attach: Sew the straps securely to the top and bottom of the backpack.
Reinforced Straps
To make the straps more durable, you can double them up by folding the strap in half and sewing it together. Alternatively, you can use a wider strap and add a liner for extra strength. Another option is to crochet the strap over a strong cord or webbing to ensure it can carry heavier loads.
Adjustable Straps
If you want adjustable straps, consider adding D-rings, sliders, or buckles. These can be attached to the ends of the straps and allow the wearer to adjust the length for a comfortable fit.
7. Lining and Finishing Touches
Adding a Lining
Adding a fabric lining to your backpack can provide extra strength and protect the contents. To add a lining:
- Cut Fabric: Cut fabric pieces to match the dimensions of the backpack’s interior.
- Sew Lining: Sew the pieces together, leaving the top open.
- Insert Lining: Insert the lining into the backpack and sew it to the top edge.
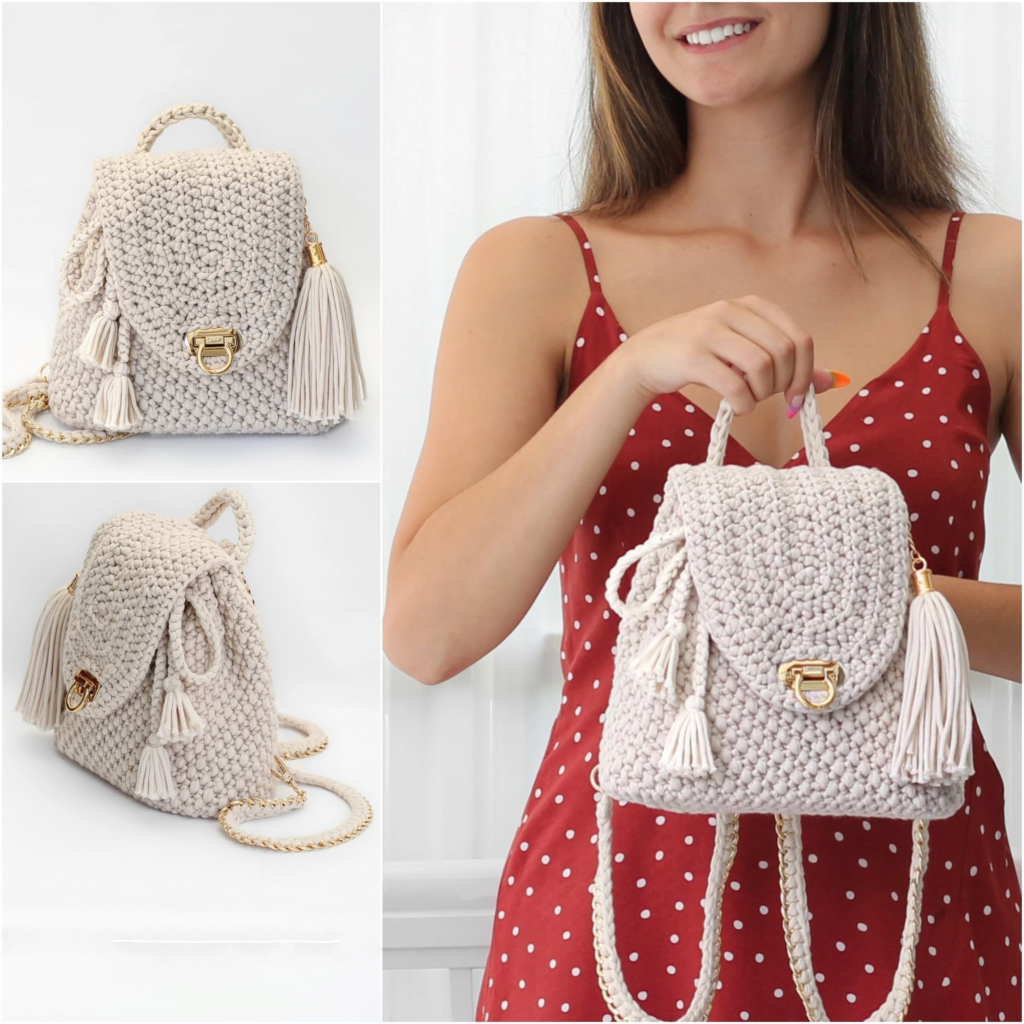
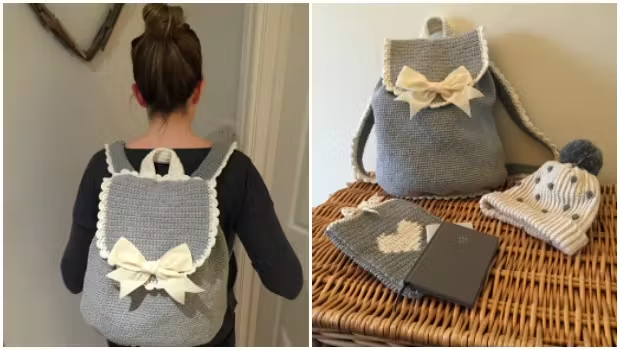
Decorative Elements
Customize your backpack with decorative elements like tassels, appliques, or embroidery. You can also add extra pockets, keyrings, or patches to make the backpack unique and functional.
Final Inspection
Before using or gifting your backpack, do a final inspection. Check all seams, straps, and closures to ensure they’re secure. Weave in any remaining yarn ends and trim them.
Conclusion
Crocheting a backpack is a fun and rewarding project that allows you to express your creativity and create a practical accessory. By following these steps, you’ll be able to craft a beautiful, durable backpack that’s perfect for everyday use or as a special handmade gift. Whether you keep it simple or add intricate details, your crochet backpack will be a unique piece that showcases your skills and style. Happy crocheting!
Related Article
1. Free Crochet Flower Patterns in 2024:From Yarn to Blooms
2. 23 Free Crochet Backpack Patterns