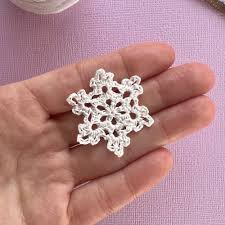
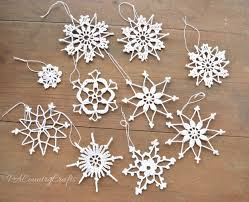
Crochet snowflakes are a classic holiday decoration, and they aren’t too challenging to make.. Only a few fundamental crochet stitches—including the treble, or triple crochet—are needed to produce this simple snowflake. The snowflake crochets up rapidly because there are only three rounds to complete. It is the ideal size for hanging on your tree when crocheted with delicate cotton fingering-weight yarn. However, you can also use these snowflakes to decorate your other homemade items, make a garland, or hang them around the room. Are you prepared to create snow? To begin, grab your yarn and hook.
Art Of Crochet Snowflake
1. Materials Needed
Before you begin, gather the necessary materials:
- Yarn: For a delicate look, use size 10 cotton thread. For a more robust snowflake, you can use worsted weight yarn.
- Crochet Hook: Size 1.5 mm for thread or a size suitable for your yarn choice.
- Scissors: Sharp scissors for clean cuts.
- Tapestry Needle: For weaving in ends.
- Blocking Materials: Pins, a blocking board, and fabric stiffener or a homemade solution (water and glue).
2. Basic Stitches and Techniques
Familiarize yourself with the following crochet stitches and techniques:
- Chain (ch): The foundation of most crochet projects.
- Slip Stitch (sl st): Used to join rounds or move the yarn.
- Single Crochet (sc): A basic and essential stitch.
- Double Crochet (dc): Adds height and texture to your work.
- Treble Crochet (tr): A taller stitch, perfect for intricate designs.
- Picot: A decorative stitch often used in snowflake patterns.
3. Understanding the Pattern
Reading crochet patterns is crucial. Here’s a simple example pattern to get you started:
Round 1: Make a magic ring, ch 3 (counts as first dc), 11 dc into ring. Join with sl st to top of beginning ch-3. (12 dc)
Round 2: Ch 3 (counts as first dc), dc in same st, ch 3, *2 dc in next dc, ch 3; repeat from * around. Join with sl st to top of beginning ch-3. (24 dc, 6 ch-3 spaces)
Round 3: Sl st into next dc, ch 3 (counts as first dc), 4 dc in next ch-3 space, *dc in next dc, 4 dc in next ch-3 space; repeat from * around. Join with sl st to top of beginning ch-3. (30 dc)
Round 4: Sl st into next dc, ch 3 (counts as first dc), dc in next 2 dc, picot, *dc in next 3 dc, picot; repeat from * around. Join with sl st to top of beginning ch-3. Fasten off.
4. Step-by-Step Instructions
Round 1: Foundation Ring
- Make a Magic Ring: This adjustable loop forms the center of your snowflake.
- Chain 3: This acts as your first double crochet.
- Double Crochet: Crochet 11 more double crochets into the ring.
- Join: Use a slip stitch to join to the top of the beginning chain-3, forming a closed circle with 12 stitches.
Round 2: Forming the Petals
- Chain 3: Acts as the first double crochet.
- Double Crochet: In the same stitch, then chain 3.
- Repeat: *2 double crochets in the next stitch, chain 3; repeat from * around the circle.
- Join: Use a slip stitch to join to the top of the beginning chain-3. You should now have 24 double crochets and 6 chain-3 spaces.
Round 3: Adding Texture
- Slip Stitch: Move into the next double crochet.
- Chain 3: Acts as the first double crochet.
- Four Double Crochets: In each chain-3 space around.
- Repeat: *Double crochet in the next double crochet, 4 double crochets in the next chain-3 space; repeat from * around.
- Join: Slip stitch to the top of the beginning chain-3. You should now have 30 double crochets.
Round 4: Finishing Touches
- Slip Stitch: Move into the next double crochet.
- Chain 3: Acts as the first double crochet.
- Double Crochets: In the next two double crochets, followed by a picot.
- Repeat: *Double crochet in the next three double crochets, picot; repeat from * around.
- Join: Slip stitch to the top of the beginning chain-3. Fasten off and weave in ends.
5. Blocking and Stiffening
Blocking and stiffening your snowflake ensure it holds its shape and looks crisp.
Blocking
- Prepare Your Blocking Board: Use foam or a towel.
- Pin Your Snowflake: Stretch and pin each point, ensuring symmetry.
- Spray with Water: Lightly mist the snowflake to relax the fibers.
- Dry: Allow it to dry completely.
Stiffening
- Prepare Stiffening Solution: Mix equal parts water and white glue or use a commercial fabric stiffener.
- Soak the Snowflake: Dip it in the solution, ensuring it’s fully saturated.
- Pin and Shape: Place the snowflake on the blocking board and shape it.
- Dry Completely: Allow it to dry until it’s firm.
6. Advanced Patterns
Once comfortable with basic patterns, try more complex designs involving intricate stitches like picots, clusters, and varying heights of crochet stitches.
Example Advanced Pattern
- Round 1: Magic ring, ch 3, 11 dc in ring. Join with sl st to top of ch-3. (12 dc)
- Round 2: Ch 3, dc in same st, ch 1, *2 dc in next dc, ch 1; repeat from * around. Join. (24 dc, 12 ch-1 spaces)
- Round 3: Sl st into next dc, ch 4 (counts as tr), tr in same st, ch 2, *2 tr in next dc, ch 2; repeat from * around. Join. (24 tr, 12 ch-2 spaces)
- Round 4: Sl st into next tr, ch 3, dc in next ch-2 space, picot, *dc in next tr, dc in next ch-2 space, picot; repeat from * around. Join. (24 dc, 12 picots)
7. Tips and Tricks
- Consistent Tension: Maintain even tension for uniform stitches.
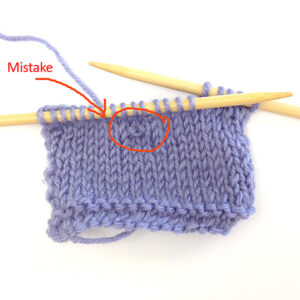
- Count Stitches: Regularly count to avoid mistakes.
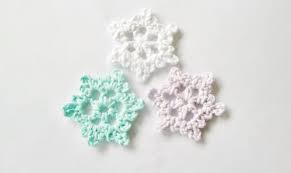
- Experiment with Colors: Use different colored threads for unique designs.
- Use Stitch Markers: Helps track the beginning of rounds.
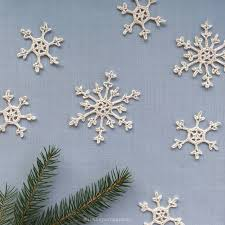
8. Creative Uses
- Holiday Decorations: Hang them on Christmas trees, windows, or garlands.
- Gift Embellishments: Add a handmade touch to presents.
- Home Décor: Frame them for wall art or make coasters.
Conclusion
A fun and adaptable craft, crocheting snowflakes is ideal for developing your abilities and making lovely decorations. You can make beautiful, complex designs that will astound and amaze with a little practice. Savor the procedure and the enchantment of transforming yarn into exquisite, detailed snowflakes.
You can add a festive and personal touch to your holiday season by making gorgeous crochet snowflakes to adorn your home and as gifts by using this tutorial. Cheers to your crocheting!
Once you’ve made a few of these, try making a few more crocheted snowflakes!
Related Article
Mandala Art: Crochet 5 easy step by step guide

Pingback: How to Crochet a Baby Cocoon In 7 Easy Steps.
Pingback: Free Crochet Flower Patterns in 2024:From Yarn to Blooms